Showing posts with label bread. Show all posts
Tuesday, February 07, 2012
White Loaves-Tuesdays With Dorie
I am not really one to keep white bread in the house. Occasionally I will tote home a soft loaf of potato bread if I know we will home and eating in. Other than that we just don't eat that much bread.
About once a month I make a loaf of bread. I like the process, enjoy the challenge, and it usually costs fraction of the price of a store bought loaf.
Good things happen when there is a loaf or two around since it is treat to have around. The best thing that happened to this loaf of bread came as a soft whisper waking me up Sunday morning, the first morning in weeks that J has stayed home. The next was the familiar smell of cinnamon toast and the sound of him singing as he poured coffee.
Then the cinnamon toast and sweet, creamy, hot coffee were in my lap as I was curled up with another episode of Downton Abbey.
Pulling fresh baked bread out of the bread box reminds me that we are very lucky people. Breakfast in bed reminds me that I have made the best choice in the entire world, making me even luckier.
I am very excited to be part of the baking group, Tuesdays with Dorie. Like countless other fans of Dori Greenspan I think she hung the moon over the baking world. I own several of her cookbooks and now plan on baking my way through Baking with Julia as part of this group.
The first recipe, white loaves, hosted by Laurie and Jules was a simple task of making a yeasted bread. It turned out splendid and is the perfect sandwich slice or better yet a vehicle for cinnamon, sugar and BUTTER!
Submitted to Yeastspotting
Labels:
bread,
tuesdays with dori
Monday, September 26, 2011
Salt 'N Pepper Soft Pretzels
We are slowly getting settled back into the groove of Bellingham. As I sit here, mid afternoon a storm is blowing in, the rain is doing what it does best here, raining. I always have loved this time of year. The leaves stating to change from green to gold, the sweet smell of precipitation soaking the dry summer earth, the fresh apples and autumn vegetables satisfy my deepest hungers for something comforting. The temperatures have not dropped and I am not bitterly cold, a walk in a windstorm is a novelty this time of year.
As the weather tuns and winter blows in, I settle into the kitchen. I bake breads and make pots of soup. I crave big hearty red wines, candles and books. Seriously you would think it is December, not the last pieces September with this talk. I know what is about to happen to the next six months and I am just preparing my body.
I welcomed this challenge from the Bread Baking Babes for the month of September. Soft pretzels were a great treat and one that I would love to make for our next winter party.
Yield: 12 pretzels
Ingredients- 1 package dry yeast (about 2 1/4 teaspoons)
- 1 1/2 teaspoons sugar
- 1 cup warm water (100° to 110°)
- 3 1/4 cups all-purpose flour, divided (about 14 1/2 ounces)
- 1 teaspoon salt
- 6 cups water
- 2 tablespoons baking soda
- 1 teaspoon cornmeal (I used semolina sprinkled on parchment paper)
- 1 teaspoon water
- 1 large egg
- Flaky salt
- Fresh cracked pepper
- Dissolve yeast and sugar in warm water in a large bowl, and let stand for 5 minutes.
- Lightly spoon flour into dry measuring cups; level with a knife.
- Add 3 cups flour and 1 teaspoon salt to yeast mixture; stir until a soft dough forms. Turn dough out onto a lightly floured surface; knead until smooth and elastic (about 8 minutes). Add enough of remaining flour, 1 tablespoon at a time, to prevent dough from sticking to hands (dough will feel slightly sticky).
- Place dough in a large bowl coated with cooking spray (or oil), turning to coat top.
- Cover and let rise in a warm place (85°), free from drafts, 40 minutes or until doubled in size. (Gently press two fingers into dough. If indentation remains, the dough has risen enough.) Punch dough down; cover and let rest 5 minutes.
- Preheat oven to 425°.
- Divide dough into 12 equal portions. Working with one portion at a time (cover remaining dough to prevent drying), roll each portion into an 18-inch-long rope with tapered ends.
- Cross one end of rope over the other to form a circle, leaving about 4 inches at end of each rope. Twist the rope at the base of the circle.
- Fold the ends over the circle and into a traditional pretzel shape, pinching gently to seal.
- Place pretzels on a baking sheet lightly coated with cooking spray. Cover and let rise 10 minutes (pretzels will rise only slightly).
- Combine 6 cups water and baking soda in a non-aluminum Dutch oven. Bring to a boil; reduce heat, and simmer.
- Gently lower 1 pretzel into simmering water mixture; cook 15 seconds. Turn pretzel with a slotted spatula; cook an additional 15 seconds. Transfer pretzel to a wire rack coated with cooking spray. Repeat procedure with remaining pretzels.
- Place pretzels on a baking sheet sprinkled with cornmeal. (I used parchment paper sprinkled with semolina.) Combine 1 teaspoon water and egg in a small bowl, stirring with a fork until smooth. Brush a thin layer of egg mixture over pretzels; sprinkle with salt and pepper.
- Bake at 425° for 12 minutes or until pretzels are deep golden brown.
- Transfer to a wire rack to cool.
Labels:
bread,
bread baking babes,
bread baking buddy,
soft pretzels
Sunday, August 28, 2011
Vienna Bread & Kaiser Rolls
My heart is still warm and bubbly from our Texas vacation.
As I grow closer with family, let people in and I search my soul hashing out my intent, suddenly my shoulders drop and I breathe easy. I know that everything will work out.
Everything works out in its own time.
As our future unfolds I feel increasingly certain and confident in the direction we are going. The path may be a bit rocky but I can tell you with a twinkle in my eye that we are going where the light shines and there are smiles on our faces. There are aspects that are out of our control, decisions that have been made and things that we must do. To balance that we have little obligation and wild imaginations. Our time in the desert dwindles to a few weeks. The boxes are filling and we are packing, freeing space, lightening the load. The next month will provide much needed change.
As we do what makes us happy, I hope with all my heart that you do the same.
This will probably be the last loaf of bread that I will ever cook in the Tri Cities area of Washington. What oven I will warm next is still a work in progress. Exciting to say the least.
We have been working our way through a huge batch on Vienna bread. Half of the dough was shaped into a perfect loaf that J has sliced and used to warm our bellies in the lazy weekend hours dusting a petite wedge with cinnamon and sugar and soft from a smear of butter. I just used two slices to slop up the dressing from the biggest salad bowl I could find to eat dinner out of. The other half I shaped into four large rolls which you see. The recipe was August's Bread Baking Babes challenge. It was a great loaf in which I had not made before but will keep it in the back of my mind as a go to for a sturdy white loaf to break at a dinner party.
Check them out and bake for yourself and others:
Vienna Bread & Kaiser Rolls
I will be back in the next day to share another handful of fun photos from our time in Texas, this time we hit the streets of Austin.Monday, June 06, 2011
Rosemary-Lemon Knot Rolls
Sometimes life feels like layers of complications, choices, questions, big life altering decisions.
Sometimes life does not follow the golden rule of moderation.
Sometimes life does not play fair.
Adult problems.
Traffic and cavities and getting laid off and never finding a job and houses and bills and friends and family drama.
Pile it on. More. More. More.
Complicated.
It happens.
It happens to the best of us. EVERYONE.
Adult size decisions are rewarded with adult size rewards.
Our reward is out there, just waiting for the perfect timing.
Patience.
This bread is aromatic, twisted, simple. Knotting the bread distracts you from far more complicated things such as gainful employment and other big adult size problems. Worrying is for the birds (employment, not my bread!). Birds don't worry, they fight back.
Rosemary-Lemon Knot Rolls
recipe adapted from Donna Hay's and ELRA
makes 8
2 teaspoons dried yeast
1 cup (250ml) warm water
2½ cups (375g) bread flour
1 teaspoon sea salt
1 tablespoon olive oil
a few sprigs of finely chopped rosemary
Zest from half lemon, or more
For sprinkling and brushing
1/2 tsp finely chopped rosemary
1/2 tsp coarse sea salt
1 tsp olive oil
Place dried yeast, flour, rosemary, lemon zest and sea salt in a mixer bowl. Using a spoon mix this ingredients together, then add water, and olive oil. Knead using a dough hook attachment on low speed for 5 to 10 minutes until the dough is elastic. Turn off the machine. Gather the dough into a ball, place it in a lightly grease container, cover, let rest for an hour.
Take the dough out from container, fold onto itself once. Divide into 8 equal portions, roll into ball, place it on a baking sheet. Repeat with the rest of the dough in the same manner. Cover the rolls with clean kitchen towel, let rest for an hour. If you want to shape it into knot rolls instead of round rolls, check out this video on how to.
Preheat oven to 400 F.
Mix finely chopped rosemary, and coarse sea salt in a small bowl. Set aside.
Just prior to load the rolls into oven, brush each with olive oil, then sprinkle some rosemary mixture.
Bake 15 to 20 minutes until golden.
For Yeastspotting and Meatless Mondays
Labels:
bread,
lemon,
meatless mondays,
rolls,
rosemary
Thursday, May 26, 2011
Bread Baking Babes May Stromboli
It is that time of the month again, Bread Baking Babes takes on stromboli for the month of May.
A rather simple bread that can be easily adapted to what ever puts wind up your skirt.
A perfect picnic food, easily transportable, tote it to your favorite outdoor secret summer spot, slice and you have a sandwich.
You totally want to know what I put in mine, what puts wind up my skirt?
Lots of cheese and fresh herbs, light on the meat. Fresh cracked pepper of course.
Follow directions and poke holes in the rolled dough prior to baking, this will make a nice tight roll, one that looks a lot better than mine.
Learn from mistakes. I will read directions. I will read directions. I will read directions.
Next time.
You really don't want it to look like this.
Make sure you have plenty of people to feed when you make this, it is a foot long sandwich monster.
Adapt. Use the huge gaping hole in the bread to fry an egg in.
Stomboli cradled eggs. Can you imagine?
Problem solved!
Stromboli
Source - adapted from Ultimate Bread by Eric Treuille & Ursula Ferrigno
Ingredients:
2 tsp. dry yeast (1 packet dry yeast...I used fast acting) (7 grams)
1 ¼ c. water (268 grams)
3 ½ c. unbleached flour (470 grams)
1 ½ tsp. salt (11 grams)
3 Tbs. olive oil (38 grams)
For the filling and topping:
8 oz. smoked swiss cheese (226 grams)
3 cloves garlic, minced 8 oz. Prosciutto, sliced thin (226 grams)
4 oz. pepperoni, sliced thin (113 grams)
Handful of fresh basil leaves
~1 tsp. coarse salt
3 sprigs rosemary, stems removed
~1 tsp. freshly ground black pepper
Sprinkle yeast into 1 c. of the water, in small bowl. Leave for 5 minutes to then stir to dissolve.
Mix the flour and salt in a large bowl. Make a well in center and pour in dissolved yeast and the oil. Mix in flour from sides of well. Stir in reserved water, as needed, to form a soft, sticky dough.
Turn dough out onto a lightly floured surface. Knead until smooth, silky, and elastic...~10 mins. Pour dough in a clean, oiled bowl and cover with clean kitchen towel. Let rise until doubled in size, 1 1/2-2 hours.
Punch down and chafe* for 5 minutes. Let rest 10 minutes.
Shape into a 14" x 8" rectangle. Cover w/ clean towel and let rest another 10 minutes.
Spread your cheeses, meats, garlic and basil evenly over dough. (You can use your own combination of meats and cheeses, or roasted veggies and garlic or whatever you like for filling.) Roll up the dough like a swiss roll, starting at one of the shorter sides, but without rolling too tightly.
Place on oiled baking sheet. Use a skewer or a carving fork to pierce several holes through the dough to the baking sheet. Sprinkle with 1 Tbs. of olive oil, salt, rosemary and pepper.
Bake in preheated (400 degrees F) oven for 1 hour, until golden. Drizzle remaining olive oil over top. Slice and serve!!
Labels:
bread,
bread baking babes,
bread baking buddy,
italian,
stromboli
Friday, April 22, 2011
Heavenly Garlic Bread
I can appreciate a good challenge and often seek something engaging to keep me focused and critical of my behaviors and actions. Challenge provides intent and purpose. I strive to live my life with intent, moving through the day with clarity and grace, a challenge that I welcome.
On a daily basis, I strive to create beauty in the everyday. I like finding beauty in the barren desert, when people doubt the existence of such allure, proving it exists is satisfaction deep in my soul.
Beauty surrounds me each and every day. Sometimes clouds get in the way of natures true colors, rain may blur the landscape or fierce winds may have my head tucked in the bend of my arm at the elbow seeking shelter, nature's true beauty are found in these experiences. It takes a bit of effort to see past the grey and wet to the green and wild.
It takes effort to look through my major faults, rough edges and the harsh lines and believe in the potential that is buried behind the struggle.
When life takes some effort, the reward is usually plentiful.
In the kitchen, baking bread seems to provide me with a rewarding challenge. I am finally able to admit that I might be slightly catching on to baking bread and trying to understand the simplicity behind the complex facade. Sometimes success seems purely luck. Sometimes all I need is patience, in this case patience provides a delicious gift.
I was extremely lucky this month and my Bread Baking Babes challenge, Dan's Garlic Bread turned out better than I had ever imagined.
It might be the best bread I have ever had the delight of eating. The crumb is so tender, dotted with lovely itty bitty pockets of air and each bite was so soft and tender all I could think about was that this bread is what a big billowy desert cloud must feel like. It gets better, oh it is possible, swirled in among the cloud like bread, the most pleasant lace of a savory balsamic reduction leads way to delightful bursts of tender cloves of garlic. Pure delight. Pure love.
Dan's Garlic Bread
If you do nothing more than make this garlic balsamic reduction, your life in the kitchen will forever be changed - there is nothing like it.
For Bread Baking Babes and YeastSpotting
reprinted with permission from Dan Lepard, Exceptional Breads, by Dan Lepard
Dan has reworked the recipe to include a longer rise, less yeast, and less sugar.
Step-by-Step photos here
for the pre-ferment
200ml water, at about 35C - 38C (95F - 101F)
1 tsp fast acting yeast
200g strong white bakers flour
for the dough
225ml water at 20C (68F)
325g strong white bakers flour
10g sea salt
75ml extra virgin olive oil
for the garlic filling
3 heads garlic, separated
2 tablespoons extra virgin olive oil
50ml water
1 tablespoon balsamic vinegar
2 tablespoons caster sugar
1 teaspoon salt
1/4 teaspoon black pepper
1 spring fresh rosemary, leaves picked and chopped
for the pre-ferment
To easily get the temperature of the water roughly correct measure 100ml of boiling water and add 200ml cold water, then measure the amount you need from this. Stir in the yeast then, when dissolved, stir in the flour until evenly combined.
Leave the mixture covered at about 20C - 22C (warmish room temperature) for 2 hours, stirring the ferment once after an hour to bring the yeast in contact with new starch to ferment.
for the garlic filling
Break the heads of garlic into cloves and place in a saucepan, cover with boiling water from the kettle and simmer for 3 - 4 minutes.
Then strain the garlic from the water, cover the cloves with cold water to cool then peel the slivery skin from the garlic. It's surprising how few cloves you get after peeling so don't be alarmed if "3 heads of garlic" sound like way too much.
Heat the olive oil in a frying pan then place the add the cloves to it and cook until they are lightly brown (not burnt) on the outside. If you burn the garlic the flavour is nasty and you will have to start again, or serve it to your friends with a straight face, so watch them carefully.
Measure the balsamic and the water then add this to the pan with the sugar, salt, pepper and rosemary. Simmer for 5 minutes until the liquid has reduced to a thick caramel.
Scrape into a bowl and leave to cool. The garlic cloves should be tender when pierced with a knife.
back to the dough:
After 2 hours the pre-ferment should have doubled and look bubbly on the surface. Measure the water into a bowl and tip the pre-ferment into it. Break it up with your fingers until only small thread-like bits remain (this is the elastic gluten you can feel in your fingers)
Add the flour and salt then stir the mixture together with your hands. It will feel very sticky and elastic. Scrape any remaining dough from your hands, cover the bowl and leave for 10 minutes so that the flour has time to absorb moisture before being kneaded. Be sure to scrape around the bowl to make sure all of the flour is incorporated into the dough.
Pour 2 tbsp olive oil onto the surface of the dough and smooth it over the surface with your hands. Now rub a little oil on your hands and start to tuck your fingers down the side of the dough, then pull the dough upward stretching it out.
Rotate the bowl as you do this, so that all of the dough gets pulled and stretched. You'll find that the dough starts to feel and look smoother. Leave the dough in a ball, cover and leave for 10 minutes.
Repeat the pulling and stretching of the dough, for no more than about 10 - 12 seconds. You may find that an oiling piece of dough breaks through the upper surface. This isn't a bad thing, but it is a sing to stop working the dough. Cover the bowl again and leave for a further 10 minutes.
This time oil a piece of the worksurface about 30 cm in diameter. Oil your hands, pick the dough out of the bowl, place it on the oiled surface and knead it gently for 10 - 15 seconds. Return the dough to the bowl, cover and leave for 30 minutes.
Uncover the dough, oil the worksurface once more and flip the dough out onto it.
Stretch the dough out into a rectangle, then fold the right hand side in by a third.
Then fold the in by thirds again so that your left with a square dough parcel. Place this back in the bowl, cover and leave for 30 minutes.
Lightly oil the worksurface again and stretch the dough out to cover an area roughly 30cm x 20cm. Dot the garlic over the 2/3rds of the surface and then fold the bare piece of dough over a third of the garlic-covered dough.
Then roll this fold of dough over so that the remaining garlic-covered piece is covered by dough. Then fold this piece of dough in by a third...then in by a third again. Finally place the folded dough back in the bowl, cover and leave for 30 minutes.
Wipe the oil off the worksurface and lightly dust it with flour. Pin the dough out again as above and fold it in by thirds each way. Replace it in the bowl, cover and leave for a further 30 minutes.
Pin the dough out again fold it in by thirds each way again as shown. Leave the dough for 10 minutes while you prepare the tray the bread will rise on.
Cover a large dinner tray with a tea-towel. Lightly dust it with white flour, then cut the dough into thirds with a serrated knife.
Place the dough cut side upward on the tray then pinch the fabric between each so that they stay separated.
Cover and leave for 45 minutes while you heat the oven to 200C (same for fan assisted)/390F/gas mark 5-6. I put a large unglazed terracotta tile in the oven and shovel the dough directly onto it with the back of a small cookie tray. It gives a much better finish and perhaps the bread is slightly crisper, but the bread will still be good placed on a tray just before baking. I also put a small tray of water in the bottom of the oven so that the heat is a little moist, which will help the bread to rise and colour.
Lightly dust the back of a cookie tray (if you have a stone in the oven) or the surface of a baking tray with semolina or flour. Carefully pick the dough up off the cloth, scooping it in from end to end with your finger then quickly lift it clear of the cloth and onto the tray.
Either shovel the dough onto the hot stone, or place the baking tray in the oven, shut the door quickly and bake for 20 - 30 minutes until the loaves are a good rich golden brown
Labels:
bread,
bread baking babes,
garlic bread,
recipe,
roasted garlic,
yeastspotting
Wednesday, April 20, 2011
For the Love of French Onion Soup
If you really want to know and I think you must, caramelized onions cures countless woes. Some afflictions, the really serious ones that leave you curled up under the covers, hiding from the beams of sunlight peeking through the closed blinds or simply the blank stare of whats for dinner - what ever it is - the act of caramelizing onions will woe and suddenly be settled back into the swing of life.
Remember to remember - life is not that serious, you are not that big of a deal, never take yourself that seriously. This is what I tell myself, this is what J teaches me, this is what gets me through.
Start chopping the onions to caramelize at first hint of troubles, then chop more and thank yourself later. The simple task of slicing onions with a sharp knife will get your mind off of anything except the natural burn that onions produce. Onions extract a brief physiological toll bound to distract, within a few moments of opening up an onion, the tangy scent wafts up to our noses, and our eyes begin to water.
I feared making french onion soup for years, saving the perfectly molten soup tucked under toasted bread and bubbly chewy cheese for a lunch date, trying to forget how I loved the soup. Homemade french onion soup was mystifying and out of reach.
French I thought, I am far from refined and skilled enough to make any recipe that eludes to French origins. I realized I have never really caramelized onions, yes sweat and sauteed but never brought them to the point of total surrender of caramelization. Caramlization takes time, turning over five cups of onions into a mere heap in the pan takes patience. Once the onions turn a deep chestnut color, your house will smell of sweet onions for days. There is a point, the onion gives up the battle to the heat of the pan, releasing a gift of sweet and smooth caramelized onion.
Apparently it is not the French aspect of the soup, French onion soup is simple, the ingredients are staples and abundant. I was afraid of was penitence not the soup. Patience is a virtue and a challenge. Patience comes with time, will and practice. The simple act of caramelizing a couple pounds of onions is a simple rhythm of the act will have you focused and forgetting why the world seemed so heavy.
Burnt garlic, we all have our faults and I am constantly learning. This bread is made out of the pizza dough from last week |
Sunday nights at our house are very quiet and calm, the perfect time for me to belly up to the stove and make us a heart warming dinner, trying to comfort us from the looming week ahead. Enter sweet, savory, caramelized onions. An omen for the week.
Onion Soup [Soupe à l’Oignon]
Source Smitten Kitchen who adapted from Mastering the Art of French Cooking
When Deb adapts a recipe from Julia Child, I sigh and know that my troubles are over and I can indulge. This recipe is for my dear friend Nuisha, I hope you enjoy.
1 1/2 pounds (680 grams or 24 ounces or about 5 cups) thinly sliced yellow onions
3 tablespoons (42 grams or 1 1/2 ounces) unsalted butter
1 tablespoon (15 ml) olive oil
1 teaspoon (5 grams) table salt, plus additional to taste
1/4 teaspoon (1 gram) granulated sugar (helps the onions to brown)
3 tablespoons (24 grams or 7/8 ounce) all-purpose flour
2 quarts (8 cups or 1.9 liters) beef or other brown stock*
1/2 cup (118 ml) dry white wine or dry white vermouth
Freshly ground black pepper
3 tablespoons (45 ml) cognac or brandy (optional)
To finish [Gratinée] (Optional)
1 tablespoon grated raw onion
1 to 2 cups (to taste) grated Swiss (I often use Gruyere) or a mixture of Swiss and Parmesan cheese
1 tablespoon butter, melted
12 to 16 1-inch thick rounds French bread, toasted until hard
Melt the butter and oil together in the bottom of a 4- to 5-quart saucepan or Dutch oven over moderately low heat. Add the onions, toss to coat them in oil and cover the pot. Reduce the heat to real low and let them slowly steep for 15 minutes. They don’t need your attention; you can even go check your email.
After 15 minutes, uncover the pot, raise the heat slightly and stir in the salt and sugar. Cook onions, stirring frequently, for 30 to 40 minutes until they have turned an even, deep golden brown. Don’t skimp on this step, as it will build the complex and intense flavor base that will carry the rest of the soup. Plus, from here on out, it will be a cinch.
After the onions are fully caramelized, sprinkle them with flour and cook, stirring, for 3 minutes. Add the wine in full, then stock, a little at a time, stirring between additions. Season to taste with salt and pepper. Bring to a simmer and simmer partially covered for 30 to 40 more minutes, skimming if needed. Correct seasonings if needed but go easy on the salt as the cheese will add a bit more saltiness and I often accidentally overdo it. Stir in the cognac, if using. I think you should.
Set aside until needed. I find that homemade onion soup is so deeply fragrant and flavor-rich that it can stand alone, but that doesn’t mean we don’t enjoy the graitinéed top once in a while. Here’s how to pull it off:
Preheat oven to 325. Arrange six ovenproof soup bowls or crocks on a large, foil-lined baking sheet. Bring the soup back to a boil and divide among six bowls. To each bowl, add 1/2 teaspoon grated raw onion and a tablespoon of grated cheese. Stir to combine. Dab your croutons with a tiny bit of butter and float a few on top of your soup bowls, attempting to cover it. Mound grated cheese on top of it; how much you use will be up to you.
Bake soups on tray for 20 minutes, then preheat broiler. Finish for a minute or two under the broiler to brown the top lightly. Grab pot holders, and serve immediately.
* Porcini or mushroom stock are a robust vegetarian substitution.
----------
So you want stand at the stove and caramelized onions. You are a saint. You should feel proud. I am proud of you. Toss in an extra chopped onion so you pull out a half cup of caramelized onions to make a lovely rye bread with caramelized onions slipped in as featured in this month's Kitchen Play contest sponsored by the National Onion Association.
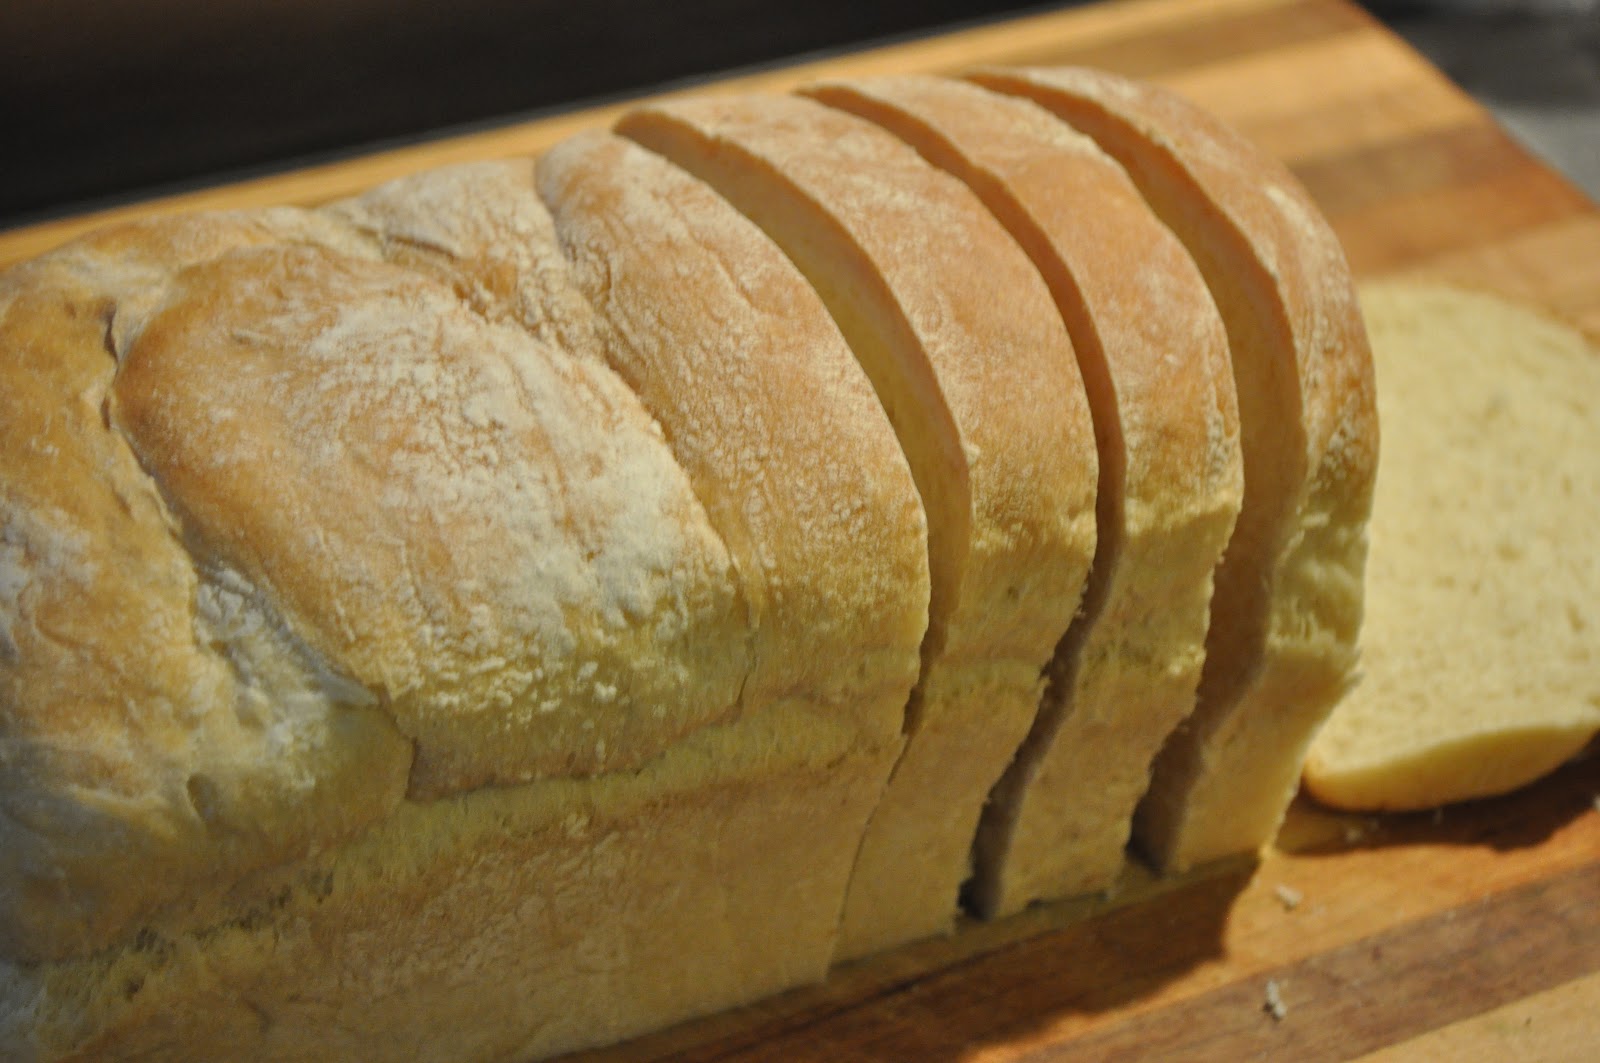
Whole Wheat Rye Bread with Caramelized Onions and Swiss Cheese
Adapted from: Cookistry
1 cup warm water
2 1/4 teaspoons instant yeast
1 tablespoon sugar
1 cup (3 1/2 ounces) medium rye flour
2 cups (9 ounces) whole wheat bread flour
1 cup (2 1/2 ounces) shredded Swiss cheese
1/2 cup caramelized onions
2 tablespoons unsalted butter at room temperature
1 teaspoon salt
Olive oil
Extra flour, for dusting
In the bowl of your stand mixer combine the water, yeast, sugar, and rye flour. Stir to combine and set aside for 10 minutes.
The mixture will be bubbly and foamy.
Add the bread flour, cheese, and onions. Knead with the dough hook until the dough is elastic. The dough will be sticky; that's fine. Add the salt and butter and continue kneading until both are fully incorporated.
Sprinkle some flour on your work surface and turn the dough out. Knead by hand, for a minute, adding just as much flour to keep the dough from sticking. Form the dough into a ball.
Drizzle some olive oil into your stand mixer bowl (or another clean bowl. Place the dough in the bowl, turning it over several times to make sure it's coated with the oil. Cover the bowl with plastic wrap and set aside until the dough has doubled, about an hour.
Preheat your oven to 350 degrees and line a baking sheet with parchment paper or sprinkle with cornmeal.
Flour your work surface again and turn the dough out. Knead it very briefly, and form it into a ball. Place it on your prepared baking sheet seam-side down. Cover with plastic wrap and set aside to rise until doubled, about 30 minute.
Remove the plastic wrap, slash as desired, and bake at 350 degrees until browned, about 40 minutes.
Move the loaf to a rack to cool completely before slicing.
Labels:
bread,
french onion soup,
kitchen play,
onion,
onion bread,
recipe,
rye bread,
whole wheat
Monday, March 21, 2011
Sweet Surrender - Bread
Breakfast in bed.
A shell of sugar and cinnamon hides a soft and delicate crumb of steaming sweet soft bread. J has perfected cinnamon toast and this morning was ethereal brilliance.
Slowing sipping fresh ground hot coffee splashed with steamed milk and a touch of sweet from a spoon full of chocolate, our time free time together is deeply cherished and enjoyed slowly.
J sings as the peculator works its magic in the quit hours of the morning, stirring the coffee, milk and chocolate, quietly saying more decadence.
You need more decadence.
Breakfast in bed, total decadence.
Life is too short, sweet thoughts and memories should fill the air.
This bread will single handedly get you one step closer to sweet surrender.
Toasted with a smear of marmalade or slathered with butter then sprinkled with a cinnamon sugar mixture then broiled making perfect pieces of cinnamon toast heaven.
Crumbs everywhere.
This bread should be ate in bed, right before you need to wash the sheets. It s about as messy as bread can get and as close as you can get to eating a cake but calling it bread as you can get away with.
Go all the way, eat it in bed, I dare you.
Not only will you have the urge to spoil yourself with breakfast in bed, the bread will make you eat numerous pieces of toast covered in sweet jellies or jams at obscure hours through out the day, you can pretend you are eating cake for breakfast on a Monday morning. Grand, just grand.
Not So Sally Lunn Bread
Adapted from SmittenKitchen; Maida Heatter’s Cakes
I urge you to make this bread with nothing but a large mixing bowl and wooden spoon. Give the mixer a break. Strong arms are sexy. There is no kneading - just stirring!
Makes 1 9×5x3-inch loaf of bread
3/4 cup whole wheat pastry flour
1 1/4 cups all-purpose flour
2 tablespoons granulated sugar
1 teaspoon table salt
1 1/8 teaspoon active dry yeast
3/4 cup buttermilk
4 tablespoons unsalted butter, softened
1 large egg plus 1 large egg yolk
In a large bowl, mix the 3/4 cup whole wheat flour, sugar, salt and dry yeast by hand.
In a saucepan, heat the buttermilk and butter together until the mixture is warm (105 to 110 degrees); don’t worry if this butter isn’t completely melted.
Gradually pour the warm ingredients into the dry mixture and stir vigorously by hand with a wooden spoon for 3 minutes.
Add the egg, yolk and another 1/2 cup flour and beat again for 3 by hand.
Add the last of the flour and beat or stir until smooth.
Scrape down bowl and cover the top with plastic wrap. Let rise for one hour or until doubled.
Meanwhile, butter and flour a 9×5x3-inch loaf pan.
Once the dough has doubled, scrape it into the prepared pan. Cover with buttered plastic wrap and let rise for a total of 30 minutes. After 15 minutes, however, remove the plastic and preheat your oven to 375°F.
Bake for 35 to 40 minutes or until a cake tester inserted into the center comes out clean.
Cool in pan for 5 minutes then turn out to a rack to cool.
----
Shared with:
YeastSpotting
Bread Baking Day #38
Labels:
bread,
no knead bread,
recipe,
sally lunn bread,
whole wheat
Subscribe to:
Posts (Atom)